Crochet tips & tricks - Standing Stitches

'Make a standing Dc'...... Whaaattt?
When i first read the above instruction in a pattern, i quickly googled 'What is a standing stitch in crochet?'. A few Youtube videos came up in the search, and i learned how to make my first standing stitch.
Since then, i have used standing stitches to start a new round if instructed to change colours. Honestly, i prefer this method as it is clean and tidy.
So what is a standing stitch? and how are they made?
A standing stitch is basically like any other stitch, except instead of chaining to the height of the stitch, you use a slip knot on your hook to start the stitch.
How to make a Slip Knot for standing stitches
Lay the yarn over your hand (Pic 1), wrap yarn around 2 fingers and cross it over the top (Pic 2), Insert hook under front loop and pick up back loop (Pic 3, 4). Pull through and pull the yarn from the skein to close slip knot on hook (Pic.5, 6)


Standing Stitch tutorial
Learning how to make a standing stitch is really a game changer, especially when you are changing colours regularly.The following tutorial explains how to make basic standing stitches.
Both US and UK terms are listed below. UK terms are in blue.
Single Crochet (Sc) / Double crochet (Dc)
With slip knot on hook, insert hook into indicated St (Pic.1), Yarn over, pull up a loop (Pic.2), Yarn over, pull through all loops on hook. (Pic 3 & 4)


Half double crochet (Hdc) / Half Treble (Htr)
With slip knot on hook, Yarn over (Pic.1), insert hook into indicated St, yarn over, pull up a loop (Pic.2), yarn over, pull through all loops on hook. (Pic. 3 & 4)


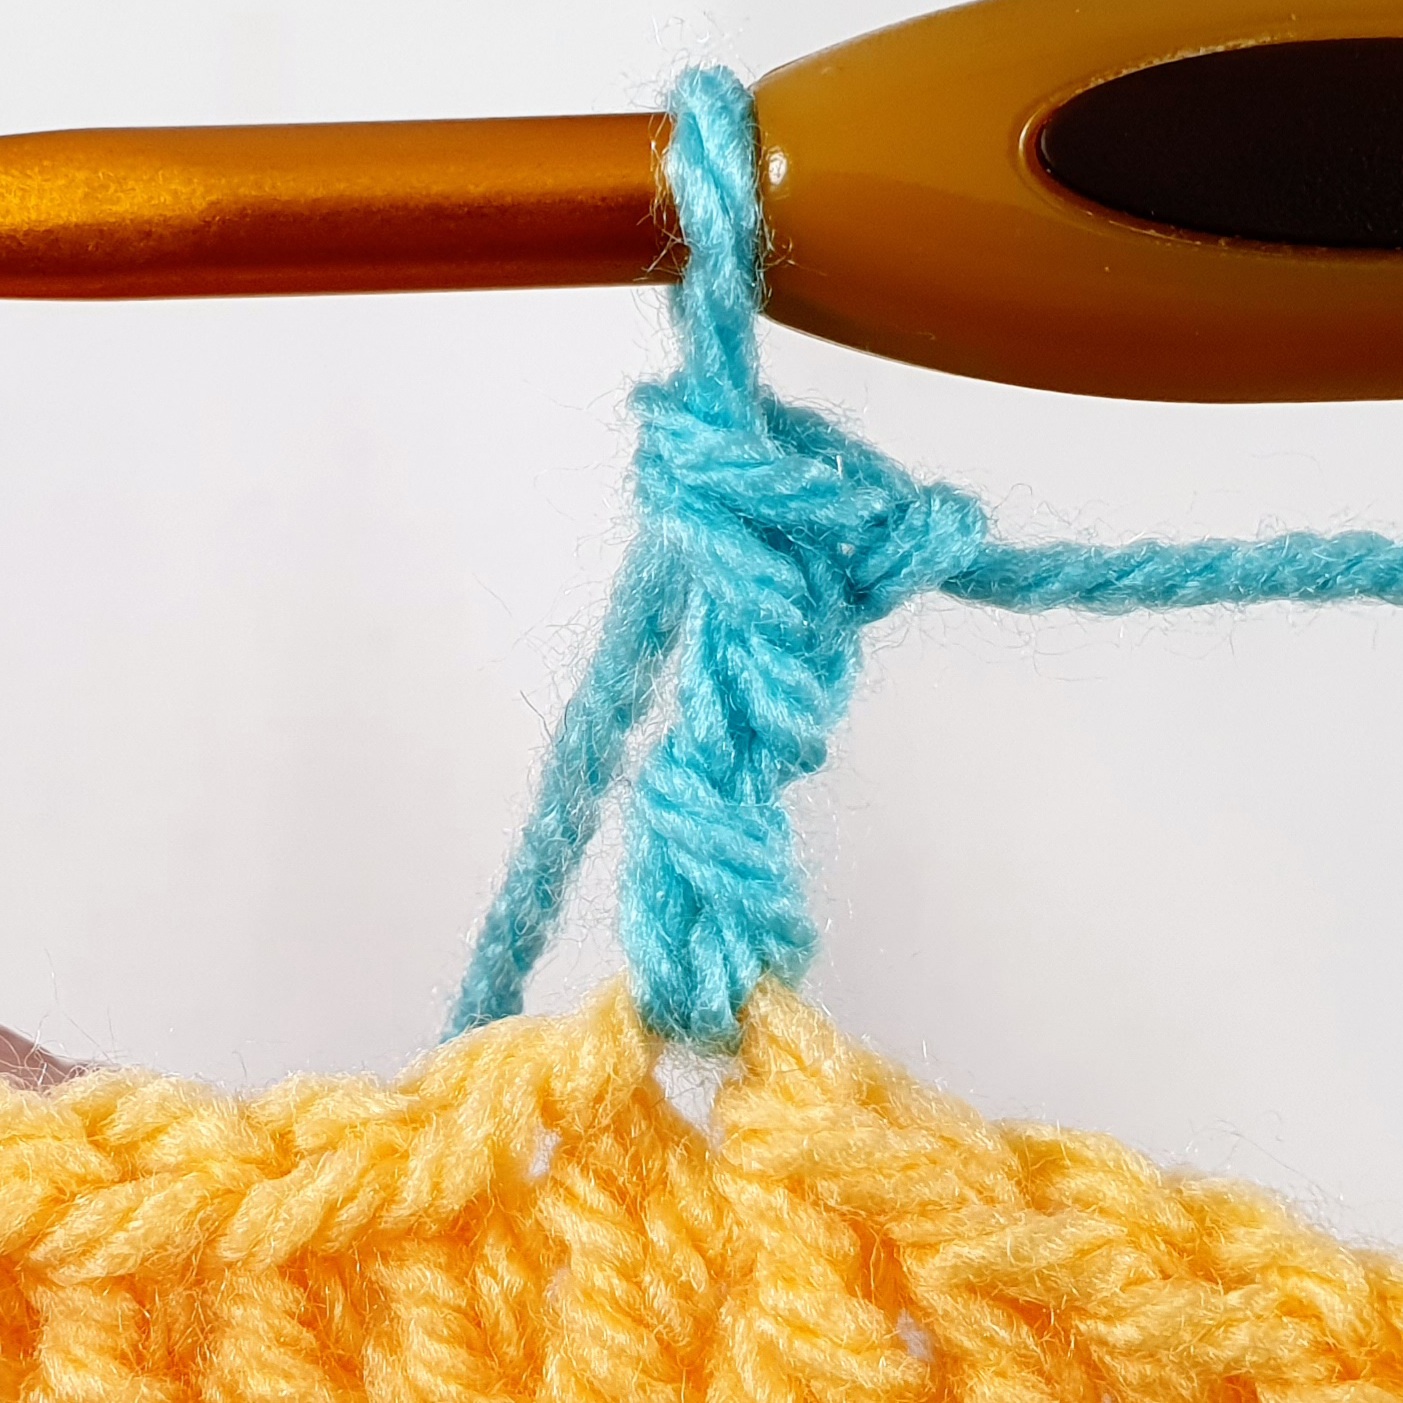
Double cochet (Dc) / Treble (Tr)
With slip knot on hook, yarn over (Pic.1), insert hook into indicated St, yarn over, pull up a loop (Pic.2, 3), *yarn over, pull through 2 loops* x 2 (Pic 4, 5, 6)


Treble (Tr) / Double Treble (DbTr)
With slip knot on hook, yarn over x 2 (Pic.1), insert hook into indicated St, yarn over, pull through a loop, *yarn over, pull through 2 loops* x 3 (Pic 2, 3, 4)


The above stitches are the basics of crochet. I hope this tutorial has helped you to expand your crochet skills. In the next tutorial we will cover standing special stitches.
If this is your first time making standing stitches, let me know how this tutorial helped. Share your sucess on Instagram using the #buttonnosecrochet or tag me @buttonnose_crochet
Happy crocheting,
Natasha
Buttonnose Crochet

** Disclaimer**
All photos are the property of Buttonnose Crochet
All photos are the property of Buttonnose Crochet


Nice tips.
ReplyDelete