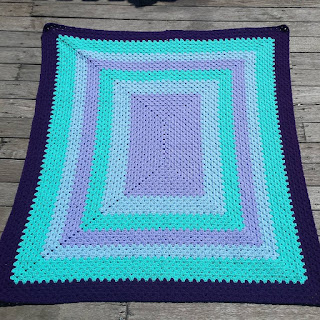
Summer Blossom Granny Square

Summer, the time of year where mother nature is at her busiest. The bees are collecting pollen, the birds are looking after their young and flowers are now in full bloom. There is also the risk of Bush fires which can destroy a lot of vegetation, but out of that destruction new life comes about.
Here is Australia, many of the native plants require fire or smoke to be able to germinate. Seeing the beauty after destruction helps us appreciate nature a little more of how she can overcome adversity.
Here is Australia, many of the native plants require fire or smoke to be able to germinate. Seeing the beauty after destruction helps us appreciate nature a little more of how she can overcome adversity.
Summer Blossom has been designed to be a simple granny square, but at the same time learn some new stitches along the way. With just one change, Summer Blossom is transformed, just like the burnt landscape of a bush fire coming back to life.
Don't be afraid to embrace her beauty, let her encourage you. Many will say that the stitches are hard, but really they are simple. In the following pattern, there are step by step photos to help you along the way so you can embrace Summer Blossoms beauty.
Please don't forget to 💗 Summer Blossom on Ravelry and share it if you love it, Thank you xx
Summer Blossom Granny Square Pattern
Materials
Scheepjes Catona (5ply/Sport/#2 weight)**
3.5 mm hook
Scissors and needle to sew in ends
** Any weight yarn can be used with appropriate hook for the yarn
** Any weight yarn can be used with appropriate hook for the yarn
Size
4" (10cm) Square
Gauge
Gauge is not important
Stitches & Abbreviations used - US Terms
Ch - Chain
St - Stitch
Sl St - Slip Stitch
Sp - Space
Hdc - Half Double Crochet
Dc - Double Crochet
Tr - Treble
Special Stitches
Fpdc - Front post double crochet
Yarn Over (yo), insert hook from the front around the post of the indicated stitch through to the back, yo, pull through a loop, yo, pull through 2 loops, yo pull through 2 loops

Bpdc - Back post double crochet
Yarn Over (yo),insert hook from the back around the post of the indicated stitch through to the front, yo, pull through a loop, yo, pull through 2 loops, yo, pull through 2 loops

Pc - popcorn
Make 5 dc in same st, pull up a loop on last st made, remove hook, insert hook in first stitch made through to the loop on last St around the back of the Stitches, pull through loop, ch 1 to secure

Stpc - Starting Popcorn
Ch 3, 4 Dc in same Sp, pull up a loop on last st made, remove hook, insert hook in first stitch made through to the loop on last St around the back of the Stitches, pull through loop, ch 1 to secure
IJ - Invisible join
Instead of Sl St to the first stitch of the round, cut yarn and pull through. With a needle, insert needle and yarn under the V of the 2nd St of the round, next insert your needle and yarn back into the last St made of the round, this creates a 'fake' V over the top of the first St of the round

Stdc - Standing Dc
Make a slip knot on hook, yarn over, insert hook into st, yo, pull up a loop, yo, pull through 2 loops, yo pull through 2 loops
Sttr - Standing Tr
Make a Sl knot on the hook, yarn over 2 x, insert hook into St/Sp, yo, pull up a loop, yo, pull through 2 loops x 3
Notes
Summer Blossom can be made in any weight yarn, using the hook size recommended for the yarn
Round 2 can be made 2 ways, either with Fpdc or Bpdc
Round 2 can be made 2 ways, either with Fpdc or Bpdc
Invisible join is recommended if changing colours
Standing Dc and Standing Tr stitches are a great way to eliminate the starting chain for a row
Ch 4, Sl St to first Ch to form a ring

Round 1 - Colour 1
Ch 3 (counts as a Dc), make 11 Dc into ring, cut yarn, Fasten off with IJ
(12 x Dc)

Round 2 - Colour 2
Standing Fpdc around any Dc of round 1, Ch 1, *Fpdc around next St, Ch 1* repeat 10 more times, fasten off with IJ
(12 x Fpdc, 12 x Ch 1)

Round 2 - Colour 2
Standing Bpdc around any Dc of round 1, Ch 1, *Bpdc around next St, Ch 1* repeat 10 more times, fasten off with IJ
(12 x Bpdc, 12 x Ch 1)

In any Ch 1 Sp, attach new colour. Stpc, Ch 2, *Pc in next Ch Sp, Ch 2* repeat 10 more times, fasten off with IJ
(12 x Pc, 12 x Ch 2)

In any Ch 2 Sp, attach new colour, (Sttr, Ch 2, Tr, 2 Dc) in same Sp,
[ *3 Hdc next Ch 2 Sp* 2 times, (2 Dc, Tr, Ch 2, Tr, 2 Dc) next Ch 2 Sp] repeat [ to ] 3 times, omitting last corner group
2 Dc next to Sttr, Sl St to Sttr, Sl st to Ch 2 Sp
(2 x Tr, 4 x Dc, 6 x Hdc each side, 4 x Ch 2 corners)

Ch 4 (counts as Dc, Ch 2), 2 Dc in same Sp
*Dc in each St to corner, (2 Dc, Ch 2, 2 Dc) in Ch 2 corner* repeat 3 times, omitting last corner group
Dc next to starting Ch 4, fasten off with IJ
(16 x Dc each side, 4 x Ch 2 corners)

In any Ch 2 corner, attach new colour, (Stdc, Ch 2, Dc) in same Sp
*Bpdc around each St to corner, (Dc, Ch 2, Dc in Ch 2 corner* repeat 3 times, omitting last corner group, fasten off with IJ
(2 x Dc, 16 x Bpdc each side, 4 x Ch 2 corners)
Sew in all ends and block square.
Personally, wet blocking is my go to method. Soak your item in warm water for 30 mins, roll excess water out between 2 towels, pin to mats or on a blocking board and allow to dry.
In a future post, i will be showing you how to join your Summer Blossom Granny Squares to make a cushion cover, a perfect gift for Mothers day.
Until then, happy hooking,
Natasha
Buttonnose Crochet
Use the
hashtags #summerblossomgrannysquare or #buttonnosecrochet on social media so I can see all your
wonderful projects
©Buttonnose Crochet
2018

Comments
Post a Comment